In This Article
In this article we will discuss what ECU Connect is, the basic features plus how to set up and use the App
| Table of Contents |
|---|
The Basics
Getting Started
Create an Account
When you first start the app you’ll be prompted to select a tuner. You’ll want to choose the shop who is going to be doing the tuning on your car. If you have recently purchased a kit find their name on the list and select them, and don’t worry you’ll be able to change it later on through the Settings menu. You can use the search option in order to speed things up.
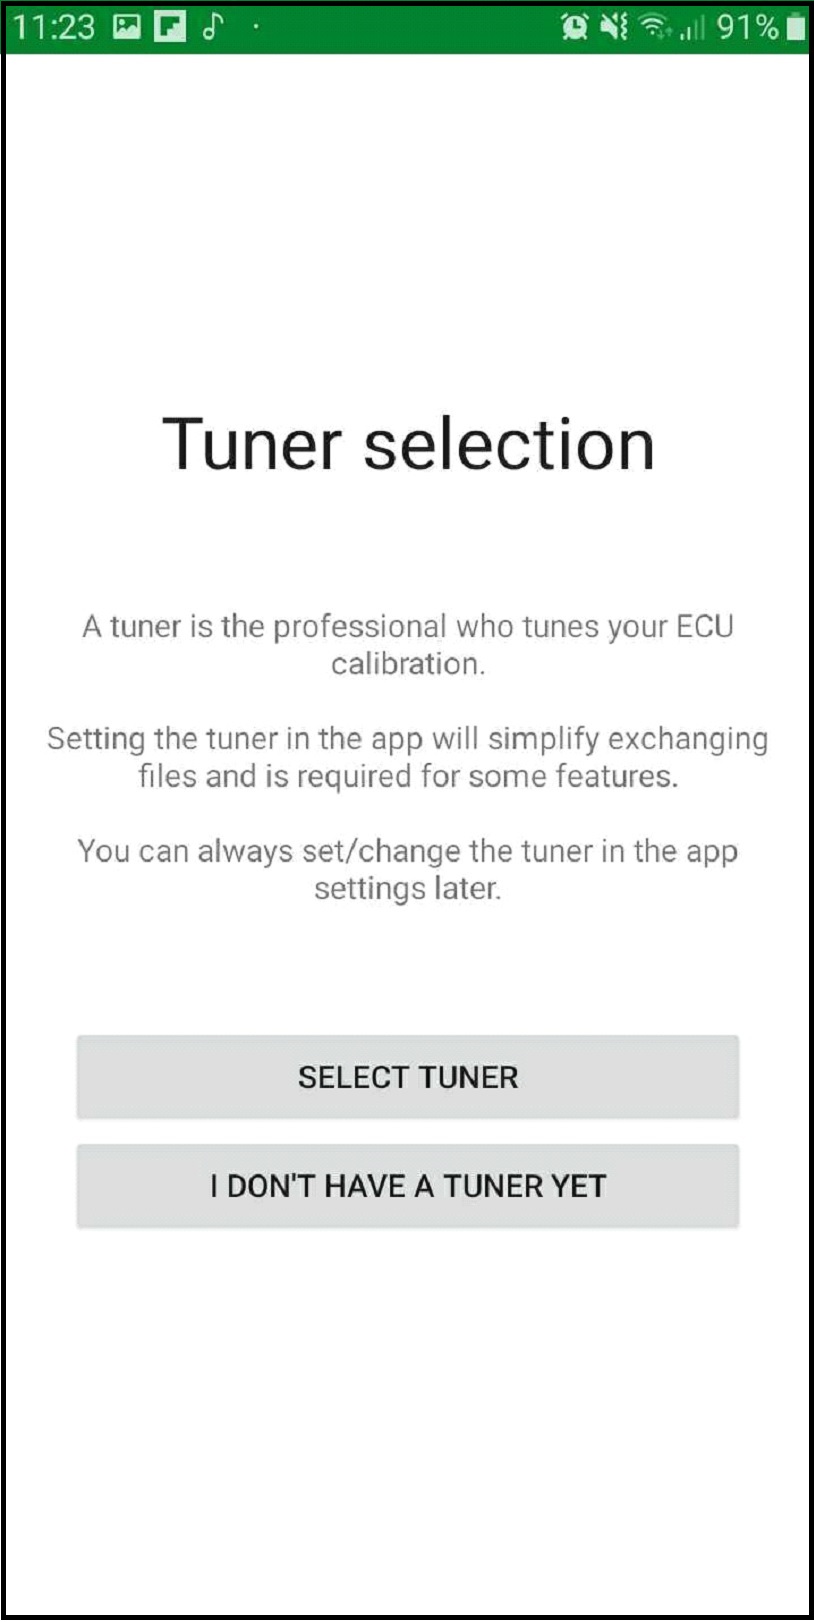
Alternatively you can use the APP without a tuner, however you won’t be able to receive rom files etc. from tuners through the APP until you add a tuner in.
After selecting a tuner (or skipping that step) the app will ask for an EcuTek account login. Either sign in or proceed through the account creation process. This step can be skipped, which will allow you to use the other EcuConnect features but will NOT allow the use of Phone Flash. You can always come back to create an account through the Settings menu.
When creating an account enter your details, read through the terms and conditions and agree.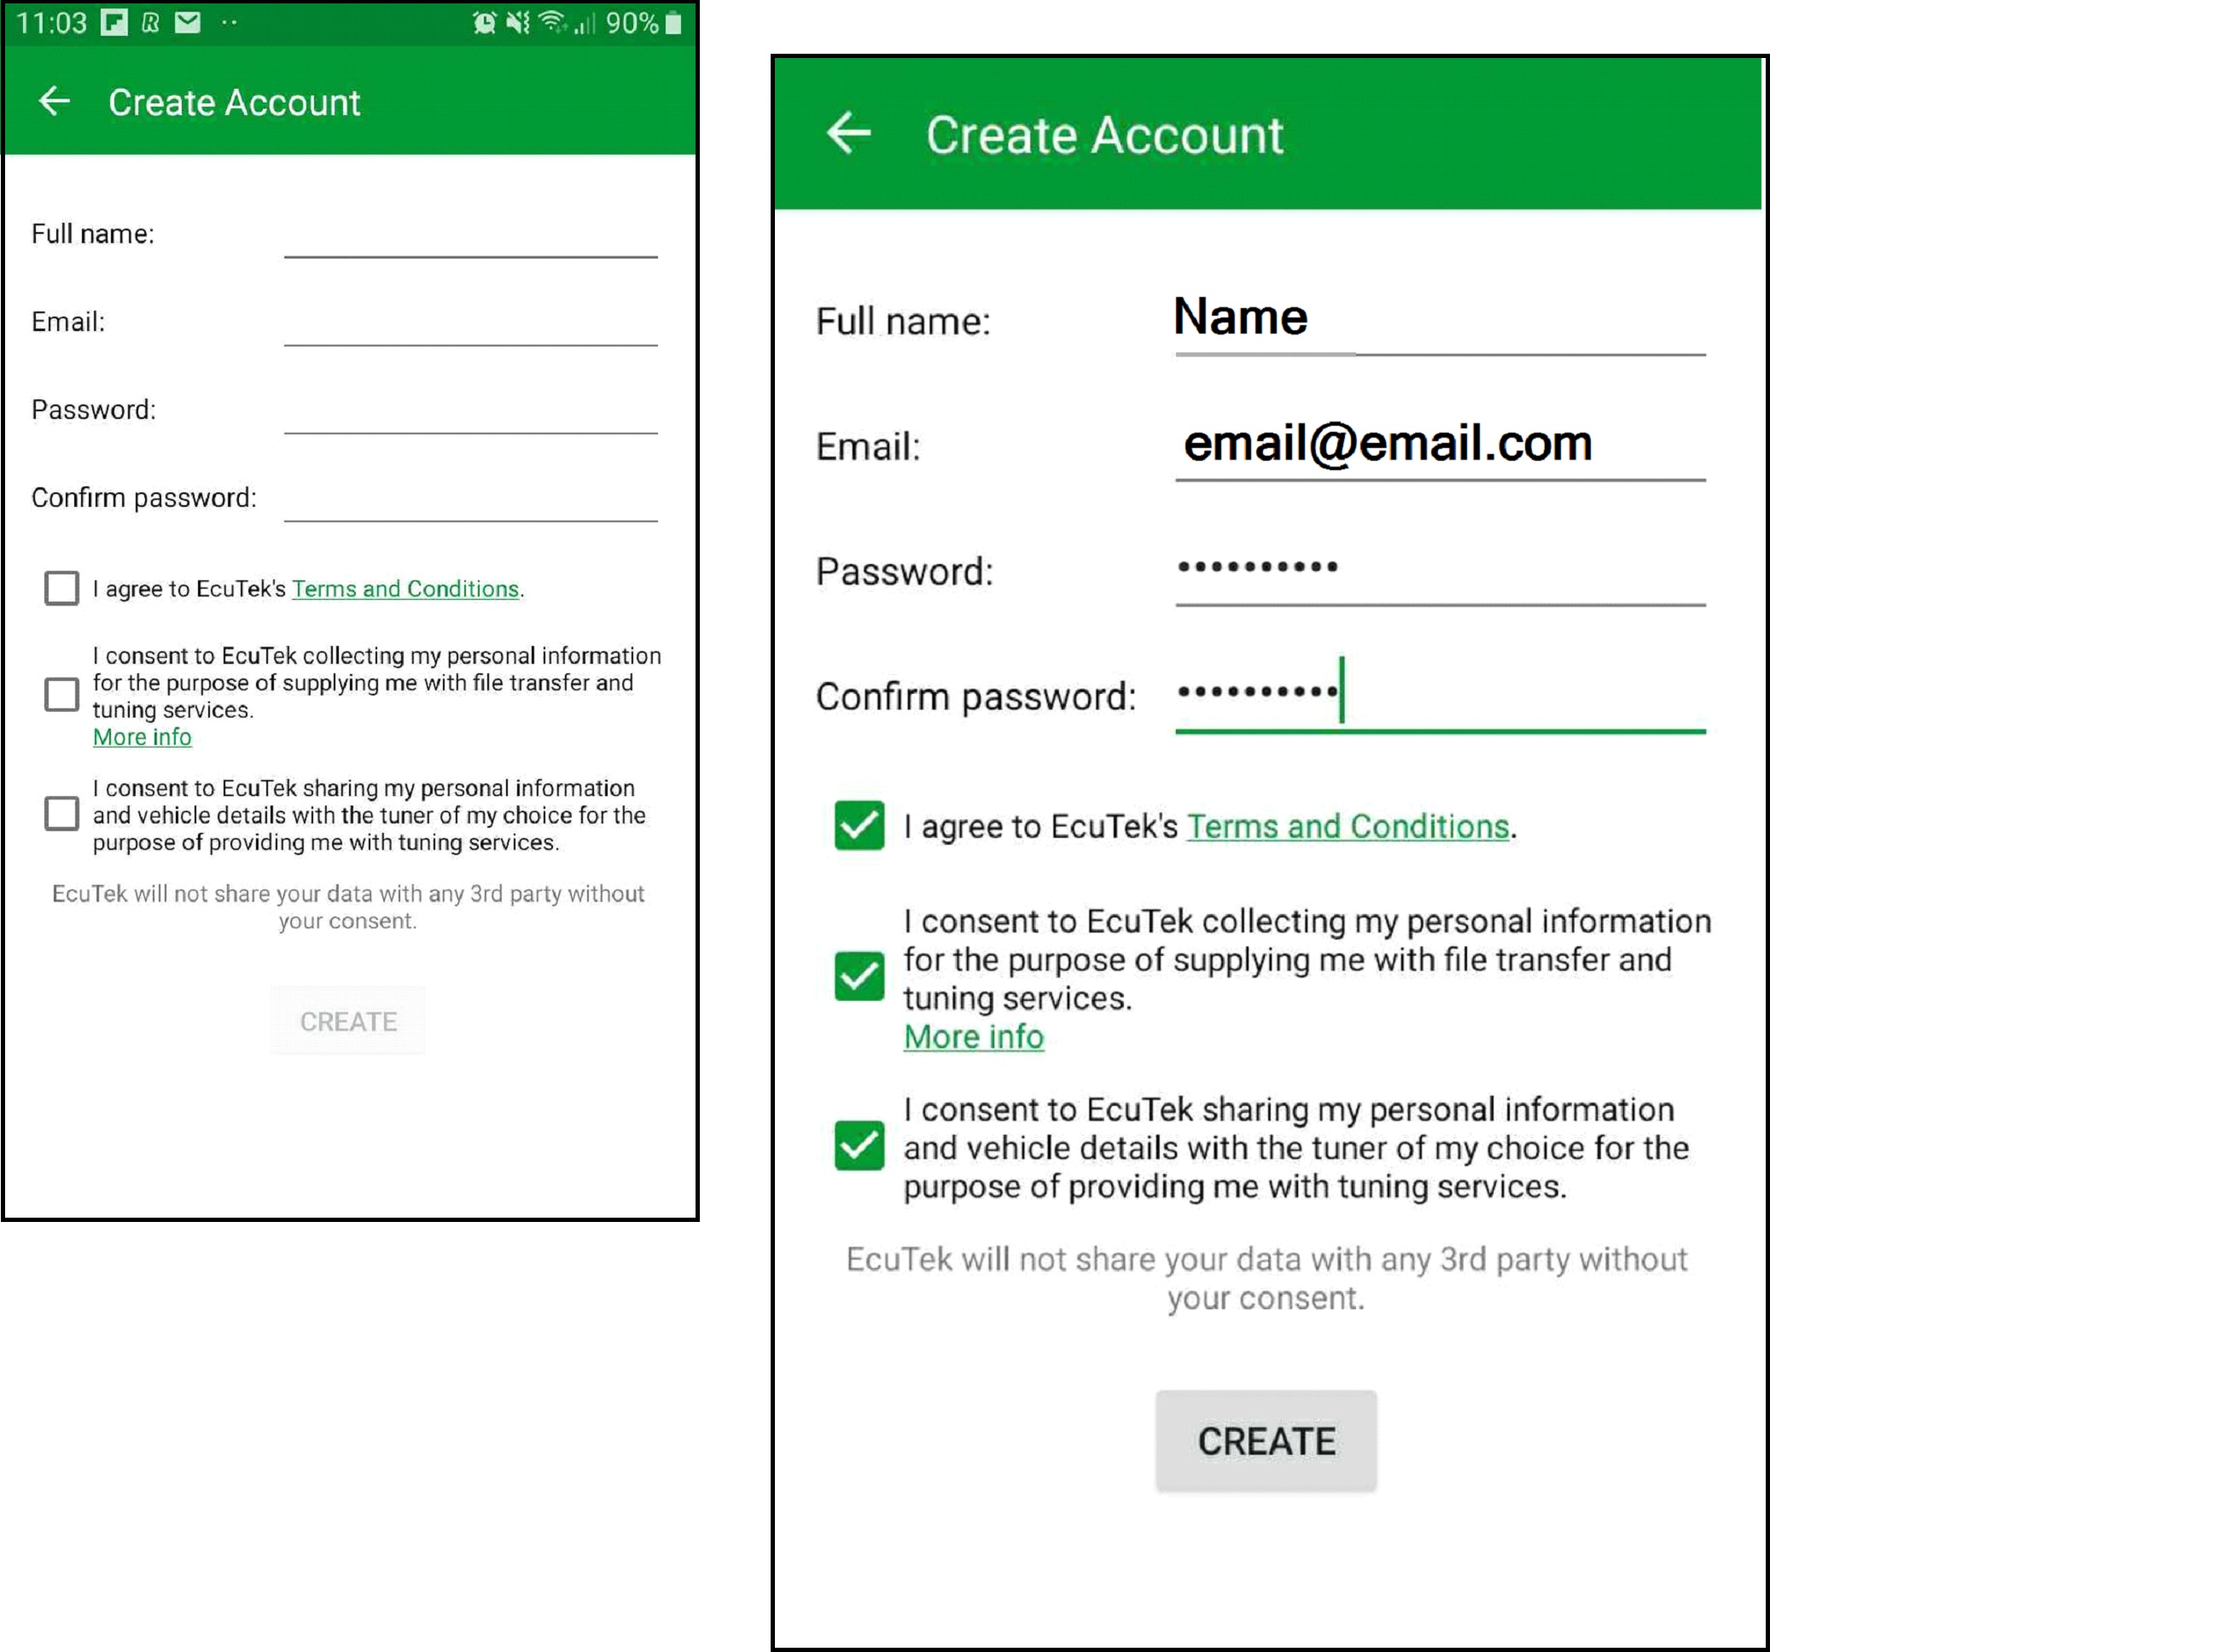
Once finished entering your details select Create to finalise your account. ECU Connect will log you in automatically. If you have your EVI-BT Vehicle interface you can now plug it in and pair it to your device.
Select and Pair your EVI-BT
The next step will prompt you to set up your vehicle interface, here you can plug in your EcuTek Vehicle Interface (EVI-BT or EVI-BTLE). Follow the on-screen instructions to pair your EcuTek Vehicle Interface. You can always manage the paired vehicle interfaces later from ECU Connect > Settings > Vehicle Interface Add/Remove.
Once you have plugged your EVI into the OBD port of your car (or connect the EVI to USB power) you can follow the prompts on screen.
If you need to configure an EVI-BT (no BTLE see instructions here https://ecutek.atlassian.net/wiki/spaces/SUPPORT/pages/1681719302/Adding+an+EVI-BT+manually#EVI-BT-Addition-Instructions .
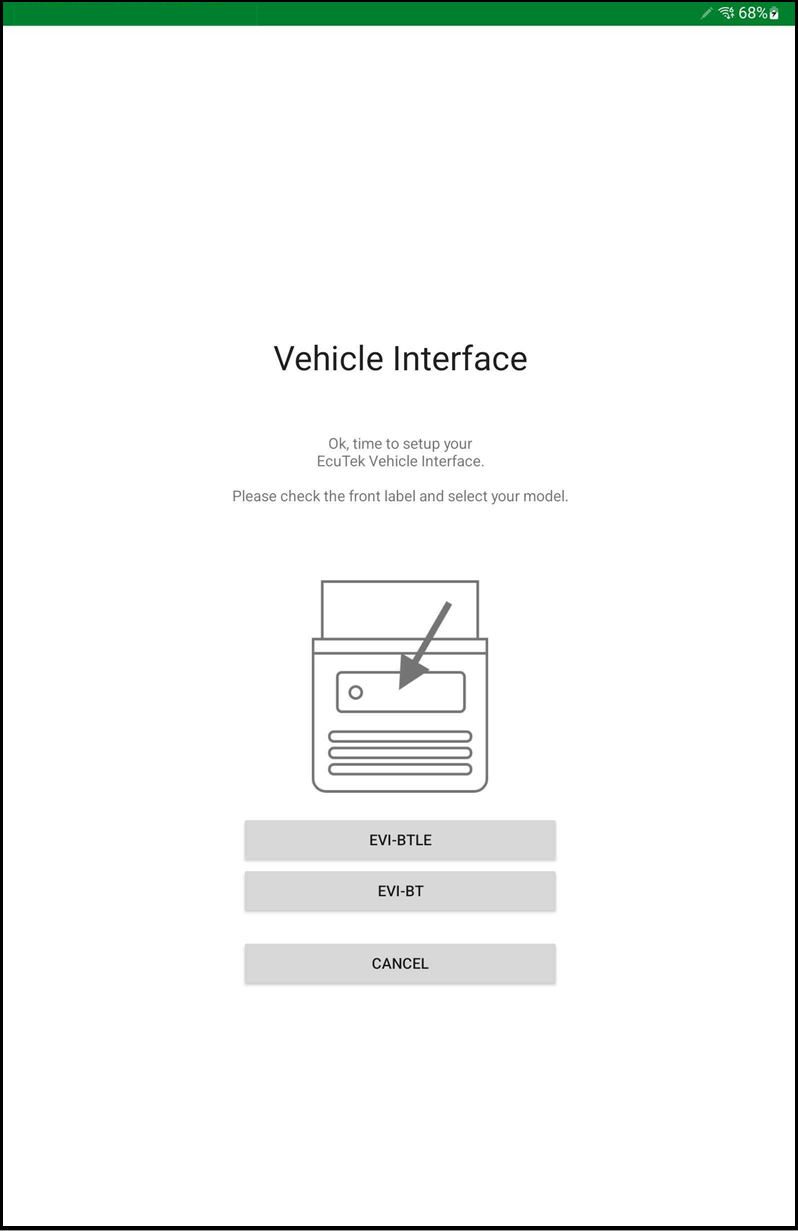
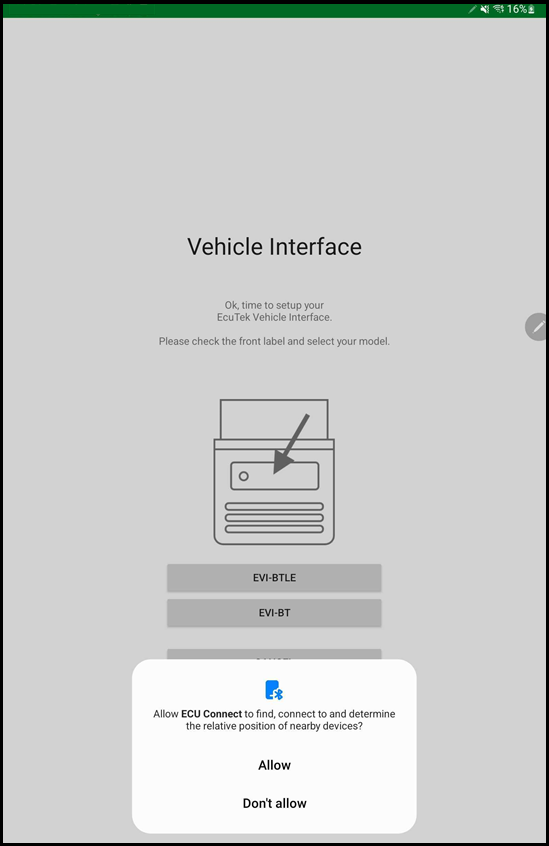
If you don’t have and EVI-BT yet you can cancel and continue with the install, otherwise select the correct device type by looking at the sticker. (https://www.ecutek.com/evi-update/ )
Once you choose the correct device type you will be guided through the process, Fort For BTLE devices the EVI is added through the App. you press the plus button
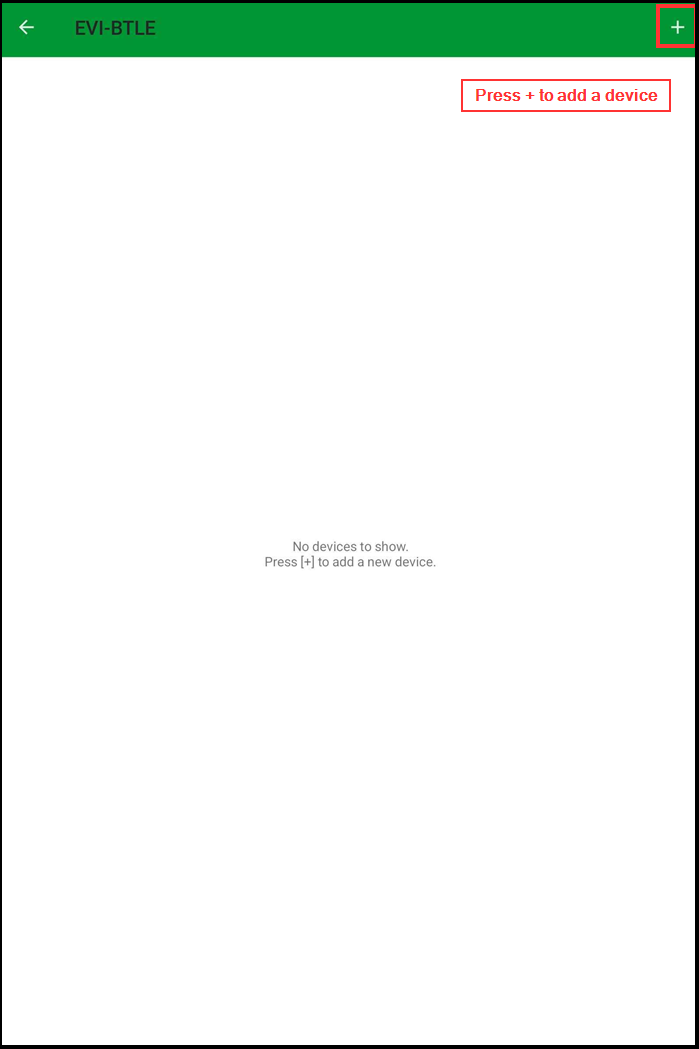
After pressing the add button permissions will be required to allow ECU Connect to connect the EVI-BTLE to your phone
ECU Connect will then scan for devices which you can then select to complete the pairing process.

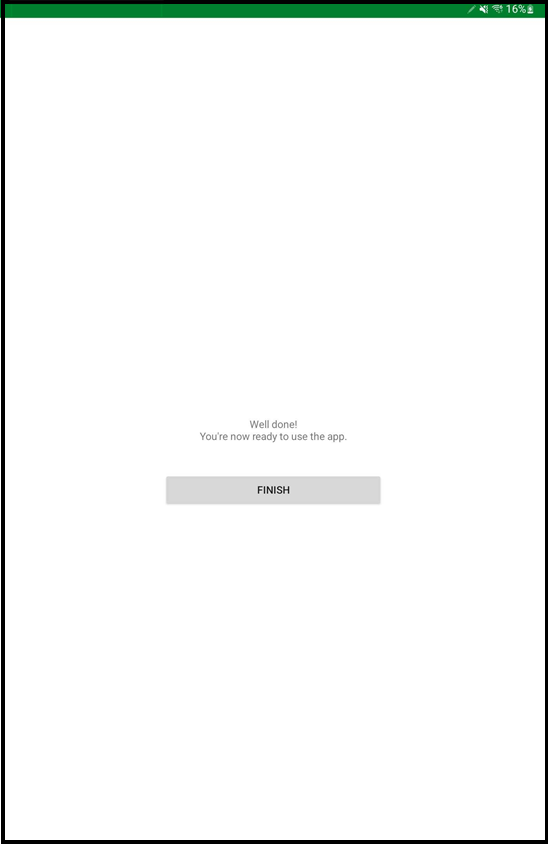
Once complete you are ready to use the app. Press the Finish button and the app main screen will appear.
For Instructions on how to pair the EVI-BT see the following article
Programming your Vehicle for the First Time
To program your car for the first time there are a few initialisation and vehicle identification processes required so that your tuner can link to your account and vehicle. To start the process you should first have completed the ECU Connect After install setup procedure or logged into your account and selected a tuner. If you haven’t the options will be offered during this process.
You will also need to have ECU Connect installed and the Bluetooth Vehicle Interface (EVI) plugged into the vehicle OBD port and paired correctly to your device. Then open ecu connect (if you have multiple EVI-BT’s paired select the correct EVI-BT)
Sending Vehicle Info to your Tuner
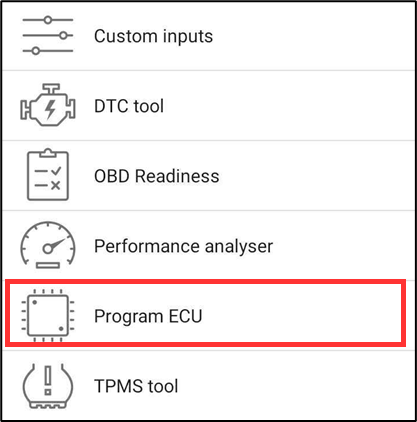
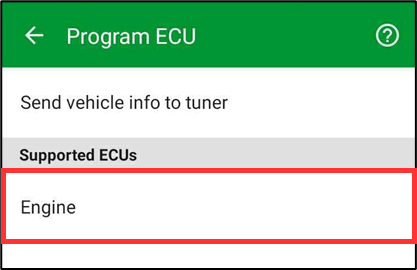
In the main menu select the Program ECU option
Next select Send Vehicle Info to Tuner
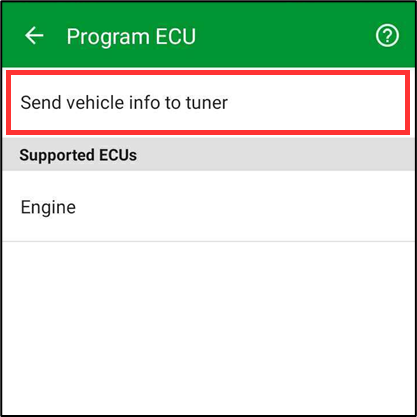
After the system collects information on your vehicle, fill in the details and select Send to Tuner. This will send an automated email with all of your information directly to your tuner. This let’s them know what vehicle you have along with what ECU Version/ROM you have.
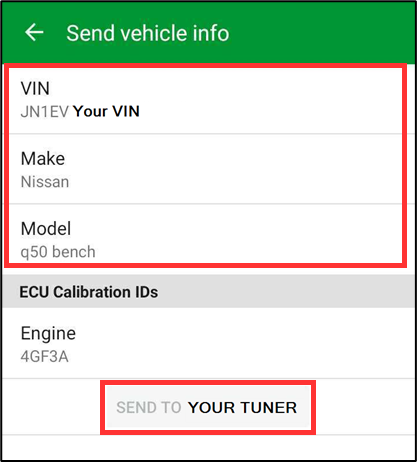
If your vehicle isn’t supported on the current version of the EcuTek Software there will be additional options to fill in as well as read and copy the engine calibration off of the vehicle to send in to EcuTek Support and get it added in. Once the dumping process is complete you can select the send option to send it to your tuner.Upon hitting the send button your information will be sent to your tuner. This includes things like your name, email address, vin as well as the vehicles calibration ID. (If you change Tuners you’ll need to resend them your vehicle information)
At this point you can wait for your tuner to get back to you. It may take some time for the tuner to prepare a ROM, you can continue to talk to your tuner via which ever means you prefer and they will let you know when your ROM is ready. If your vehicles CAL ID needed to be added for support the process may take up to 7 days, communication will be via the support desk at EcuTek.
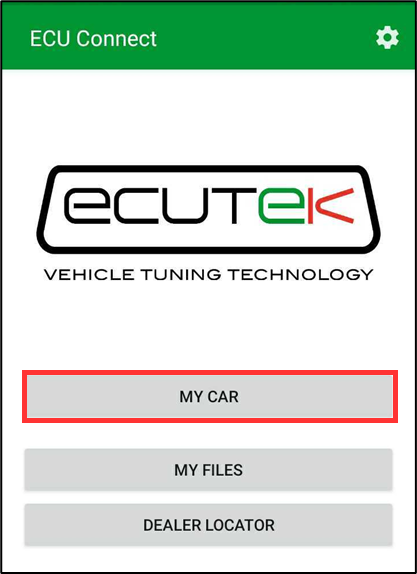
Once your files have been uploaded to the cloud by your tuner and you are ready to program your vehicle open ECU Connect, plug the interface in and go to My Car -> Program ECU.
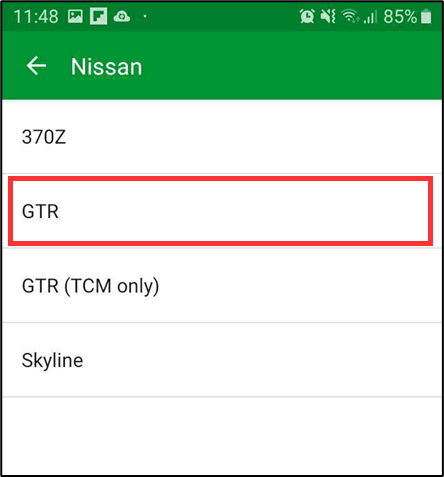
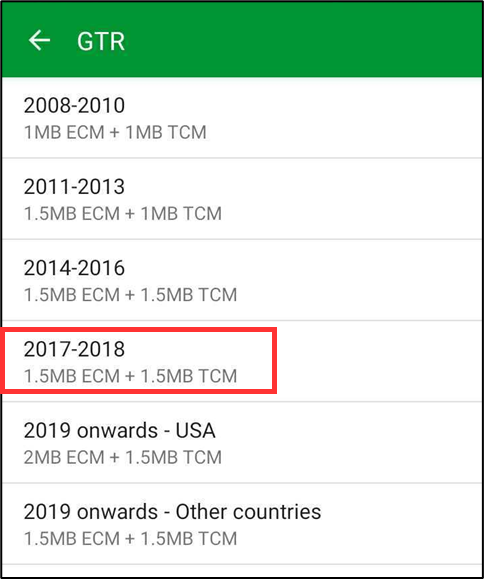
On the program menu select which ECU (Vehicle) you wish to program.
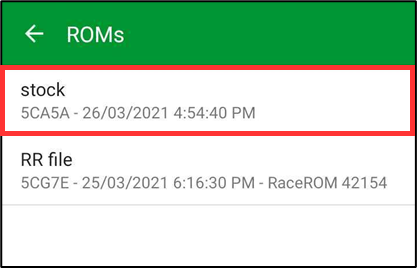
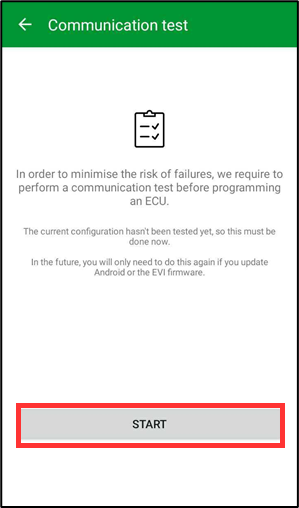
After selecting your vehicle choose the ROM file you wish to program. After selecting the vehicle the app allow you to go through a communication test.
Before you can program the vehicle the first time the Bluetooth communication between the phone and the EVI must be tested. Simply press “START” to commence the test and wait until completion. This test makes sure the car is in a state that will allow proper communication between the car’s ECU, your EVI-BT dongle and phone.
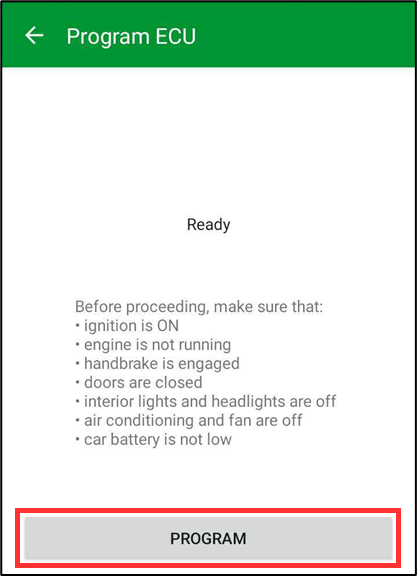
Once the test is complete make sure that your car is in a state where the ECU will willingly take a flash. This includes
The vehicle’s ignition is ON
The engine is not running
Your handbrake is engaged
Doors are closed
Interior lights and headlights are turned off
Air Conditioning and fan are turned off.
Car battery is not low (It can be helpful to have the vehicle on a charger for this step)
If your car doesn’t require the key to be in the ignition make sure the key stays in range of the car at all times and that the key has proper battery.
Turn off the stereo
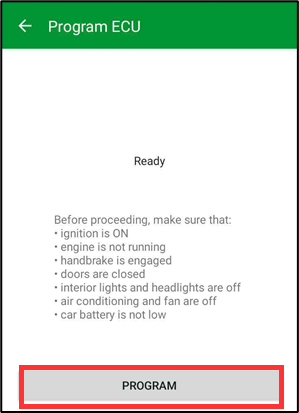
You can now select Program.
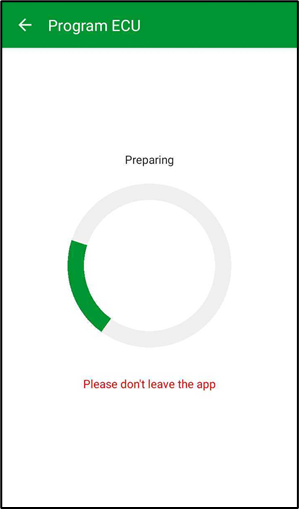
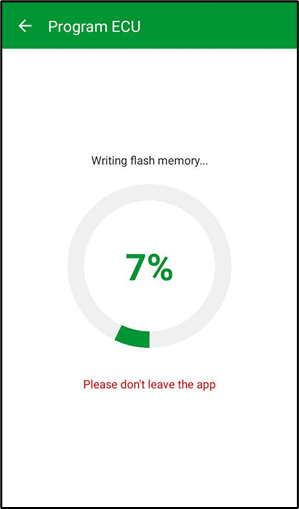
To program the ECU the system will first prepare your ROM file, Erase the stock Calibration Data and lastly program in the tuned calibration (See the Quick Reference Flow Charts for more information)

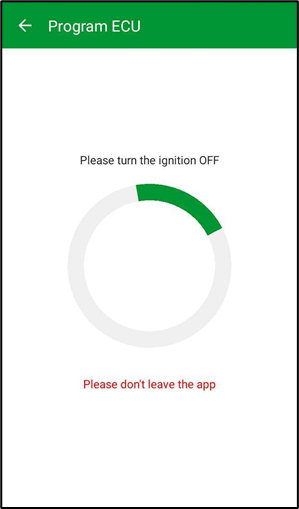
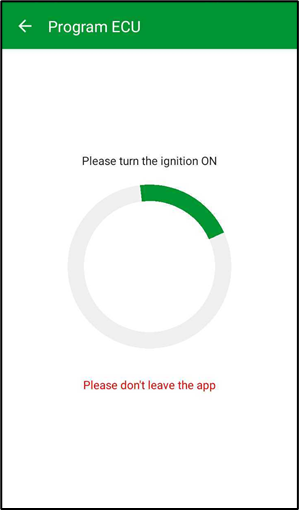
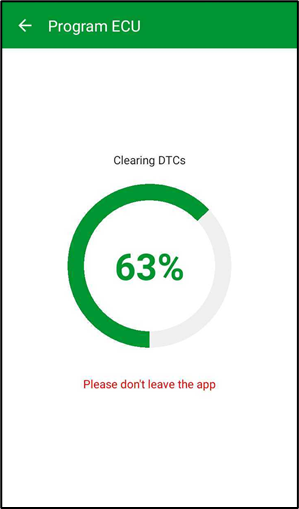
Near the end of programming you will be prompted to key the car off and back on again, this allows the system to go through and clear any DTC’s that may have come up during the programming process. Do NOT start the car at this point.
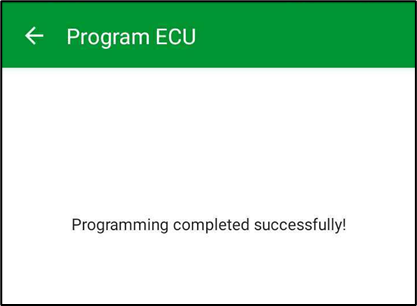
Once you’re done you can perform whatever tasks (if any) your tuner has requested you perform (Logging etc.) You can also easily forward maps to your tuner through the files menu.
Failed Programming
Finding the cause of the failed programming Attempt
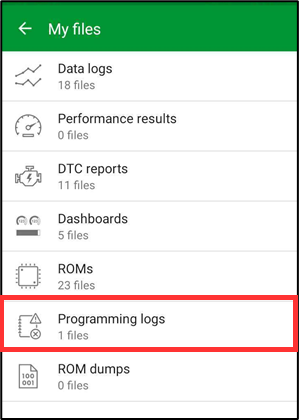
Make sure to use the error message to determine the cause of the programming failure. Reading the error message details created at the time of the failure will help point you at the reason. To look at the details go to My Files → Programming Logs
 |  | |
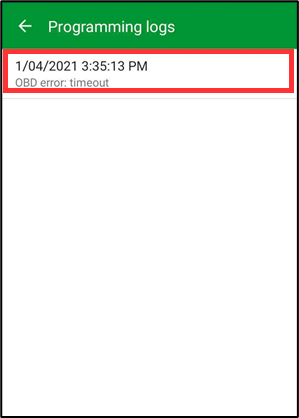 | 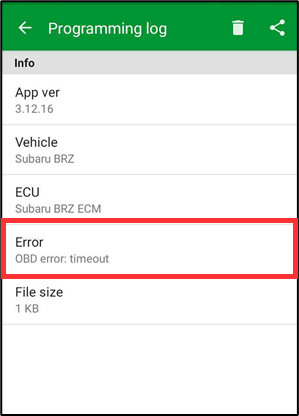 | 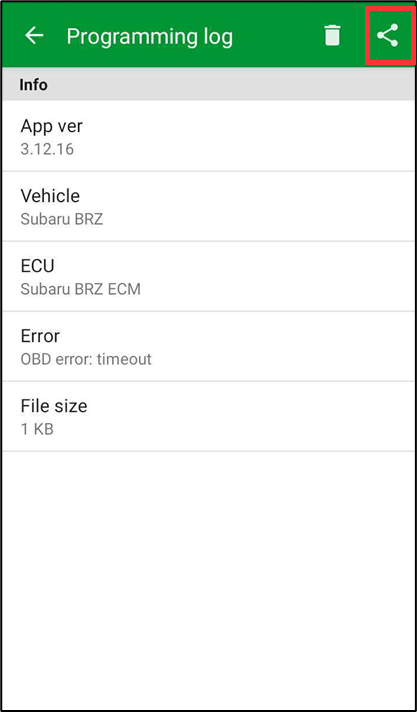 |
In the above case it was a time out error for OBD communications. This usually means the system lost communication at some point. Check the connection between your OBD port and the EVI-B T dongle. Confirm the battery power of the vehicle is stable and that nothing else is attempting to connect to your phone’s bluetooth at the time. For any errors you can find a list of the most common messages and resolutions Here: Programming, Vehicle Tools & Logging Error Messages Additionally you can select the programming log in your files and share it with your tuner or EcuTek support to help resolve your issue.
Recovery Programming
If you feel you’ve resolved the cause of the failed programming you can attempt to recover the ECU. In order to recover the ecu follow the steps below.
Start the app and press my car.
After it tries and fails to detect the ECU the option for recovery will show.
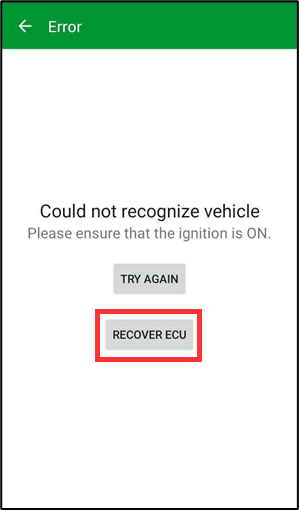
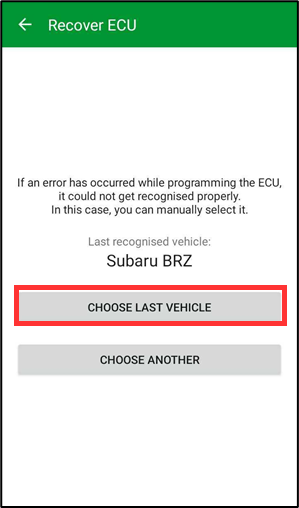
Select Recover ECU and then choose the correct Vehicle (the last programmed vehicle should be correct if not manually choose the correct vehicle type)
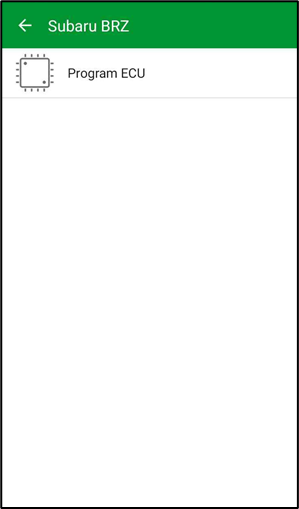
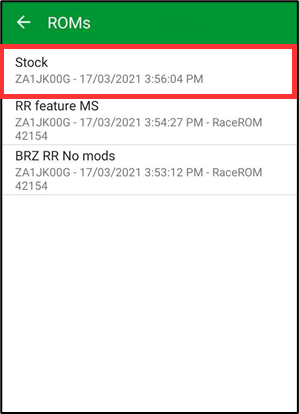
Select Program ECU and select a stock ROM
 |  |  |
Failed Programming but no “Last Recognised Vehicle” option
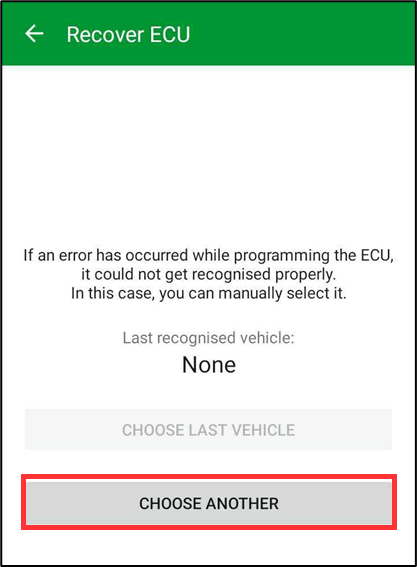
When the app opens you are presented with the “None” option from the last recognised vehicle screen, you can select the “Choose Another” ECU button.
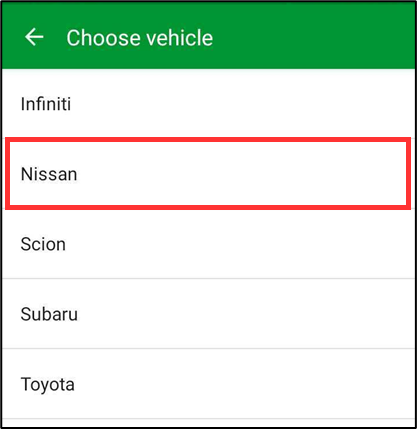
Once selected you will be able to manually select the correct ECU type from the list of supported ECU’s.
 |  |
Once you have selected the correct vehicle type you will be able to Program the available ECU’s, simple choose the stock ROM file for your vehicle and Press the program button.
| Note |
|---|
It is critical to choose the correct vehicle type at this stage. if you have any questions regarding your ecu type, contact your tuner for the appropriate choices. |
Quick Reference Flow Charts
Initial App Startup

Programming an ECU Without Files from your Tuner
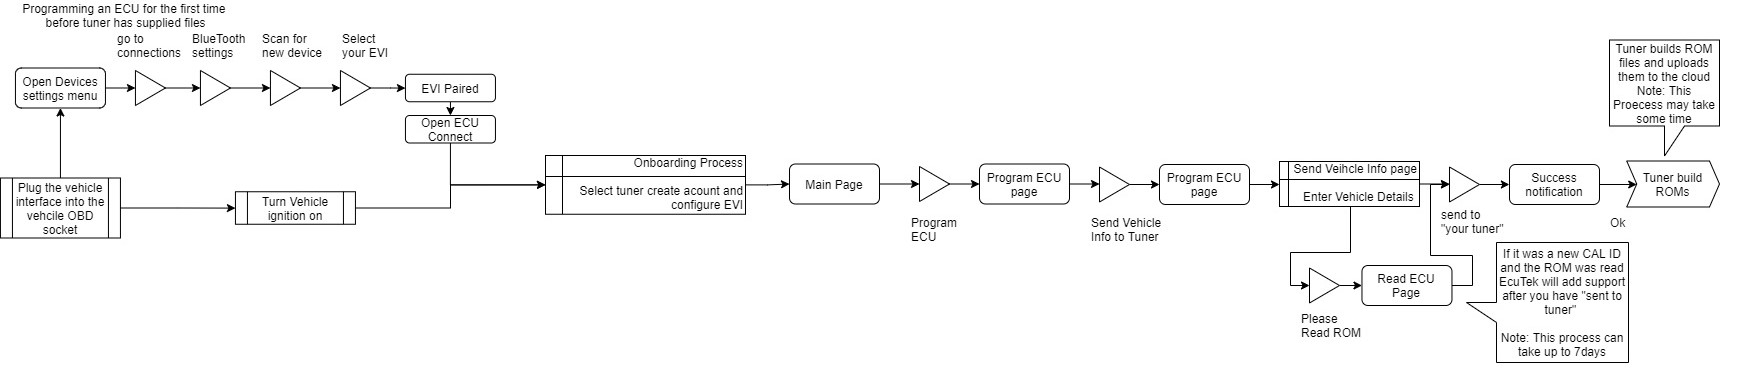
Programming an ECU With Files From your Tuner

Steps The System Goes Through While Programming the ECU
