VR30DDTT Custom Sensor Input Setup
- Brandyn Mowat
- Lucan Hetherington

Nissan/Infiniti VR30DDTT ECU Input
v1.4
ProECU Tuning Manual Supplement: ECU Sensor Input Setup
Flex Fuel and Sensor inputs (via CAN)
Due to the loss of the extra input hardware on the ECM, you can only use CAN Inputs, to get a flex fuel sensor input over CAN you must use a CAN compatible ethanol content sensor kit. You will need to tee into the CAN wiring on the Main CAN bus, this bus is connected to many different modules and connectors all over the vehicle. there are a few possibilities for CAN wiring below.
Note: The OBD Port does not appear to be suitable for use with CAM Sensor imports as its possible that the gateway module prevents the communication from passing through onto the main engine CAN bus.
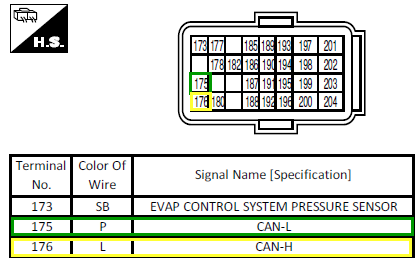
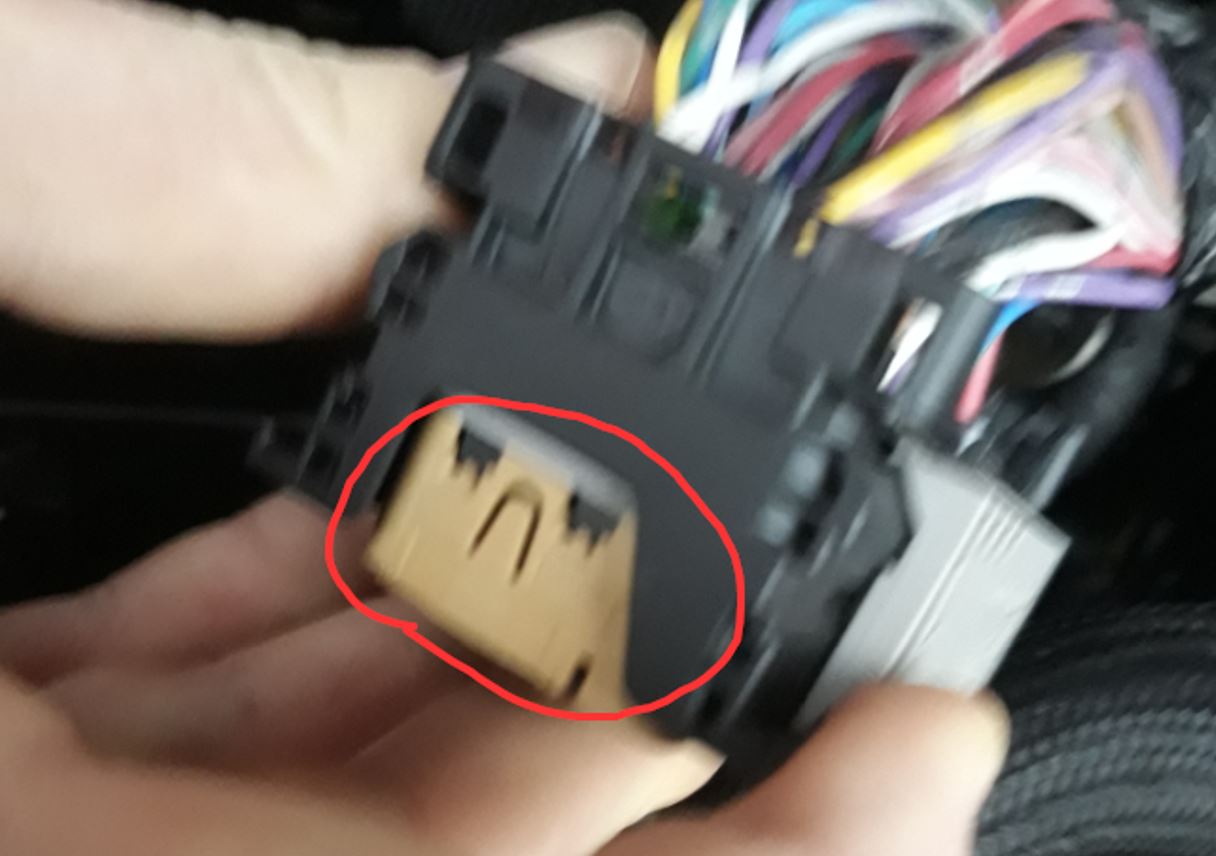
The ECM Pins or wiring
Pin 175 CAN Low
Pin 176 CAN Hi
it is possible that other places might be able to be used however these have not been tested, for example the steering module can wiring

To configure a flex fuel, fuel pressure or custom can device (for logging only at the moment) you will need to do the following
Configure a CAN Sensor Type to the sensor type in use, there are two CAN IDs available and you can select one of the Pre-set sensor types or a custom device.
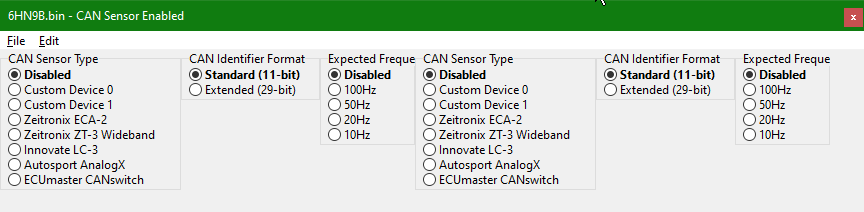
You need to select the closest Expected Channel Frequency to the CAN devices send rate (which should be available from the kit manufacturer).
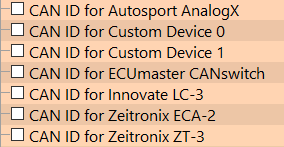
If using the standard CAN address you won't need to do any further configuration. If using a non-standard (User configured on the unit) CAN ID you'll need to change the values found under "CAN ID for ___" and add it in Hex format.
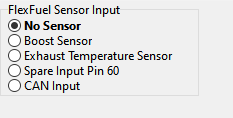
You will then need to set the sensor you are using up as an input. this is done by choosing the sensor and setting it as a CAN Input, If you are choosing a 0-5V input it may be used instead Sensors → Flex Fuel Sensor Source as CAN input
For Information on Custom CAN Sensors or other Preselected Units please see the RaceROM CAN Sensor Manual
If you are using 2 sensors at once, e.g. Ethanol Content and Fuel pressure you will have to manually set up a custom CAN device as per the link above. and then assign the CAN sensor output to a Channel Usage.

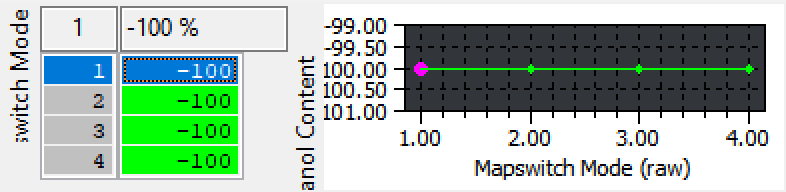
Note: You will need to set a channel multiplier of 0.01 for the ethanol content as the flex fuel calculation functions ONLY take a content value of 0-1 (not 0-100%). If you don’t scale ethanol content by 0.01 (to get a 0-1 value) the sensor will always be out of range and apply the torque limit. Ethanol content will read correctly from the flex fuel ethanol content logging parameter.
There is also the option to run pre mix blend maps using the Flex fuel code depending on the car owners preference and the tuners consideration.
Sensor Error Handling and Failsafe
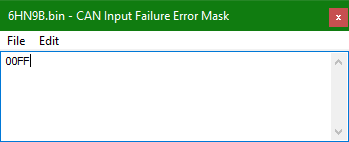
Some CAN sensors or modules have the ability to report a failure codes using part of the can message (for senor disconnect / voltage out of range etc). This can be done by sending a byte in the can message (e.g. the ECA-2 error state byte) that contains bit flags for an error condition. You can choose which of these bits you which to ignore or allow to set an error state in the can sensor function using the CAN Input Failure Error Mask. these are set as for default as FF or interpret data as incorrect, so if the error byte has a value above 0 the sensor will be judged as in error state and use the last known good value and applying a torque limit.
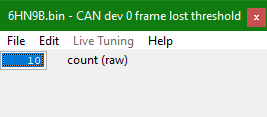
When no information is received or the Information is determined to not be reliable by looking at send and receive message rates the CAN sensor functions will start counting the lost frames (at the receive frequency). Once it goes above the Frame Lost threshold be put into a failsafe mode.
The CAN sensor Timeout allows a failsafe to be triggered in the event that no signal is reported from the sensor within the chosen time frame. (milliseconds)

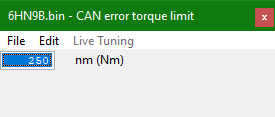
In the failsafe mode a Torque limit will be applied, and the Sensor system uses the last know good value of the sensor reading.
Note - The ECA-2 sends messages at 4Hz and the current implementation of frequency measurement only has a number of set frequencies, the lowest being 10HZ, so you will always see a number of missed messages in the count. There are a few options to get around this issue,
You can set the error threshold high enough so that even with the difference in refresh rate it doesn't set off the can error function. (this is believed to be around 50 counts)
You can change the setting of the ECA-2 sensor to refresh at 10hz (sadly its not easy to change the code in the RaceROM patch to allow a CAN transmission check of 4hz or less at the moment).
You can the disable the expected frequency and run without send rate checking though the sensor error byte will still operate.
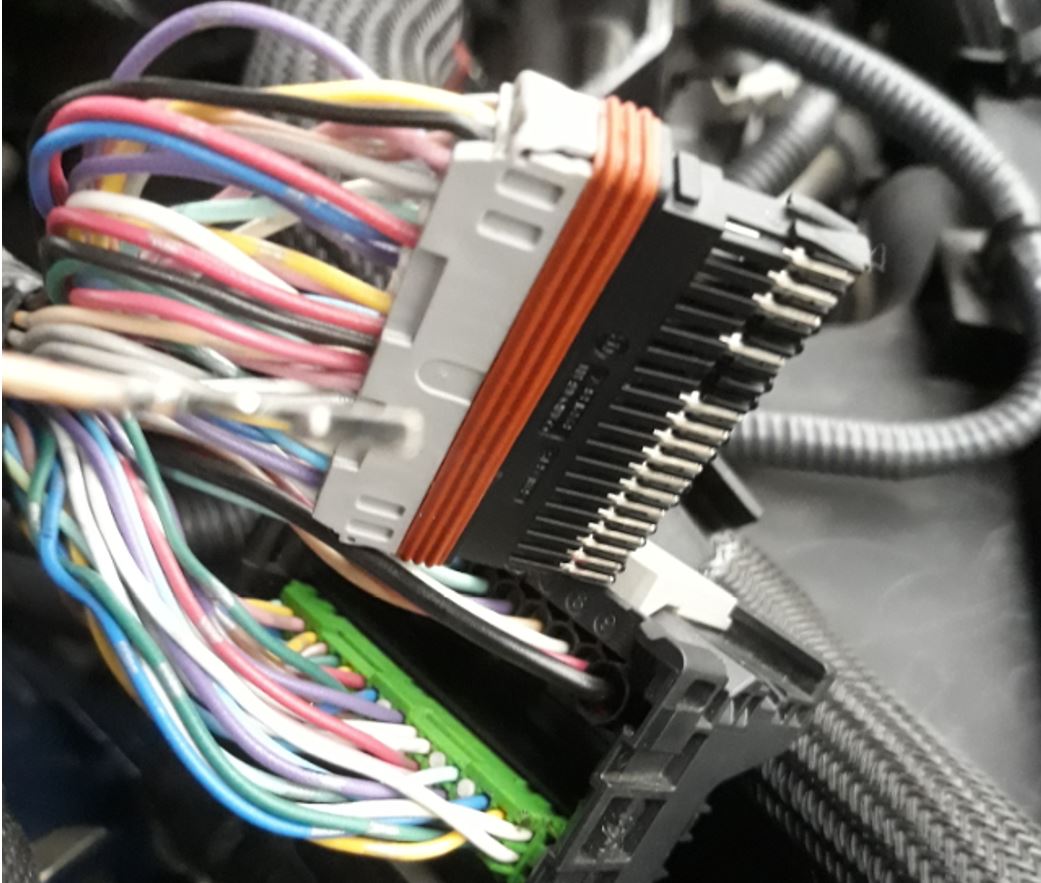
Flex Fuel Sensor Setup/Wiring to ECU
Unlike other platforms, we were able to find an unused ECU channel into which we were able to input a signal from an ethanol content sensor. To do so you'll need to pin it into the ECU. While the placement of the wiring and ethanol sensor may vary based on the manufacturer of the kit, it will need to be input through the same point in order to work properly with our software.
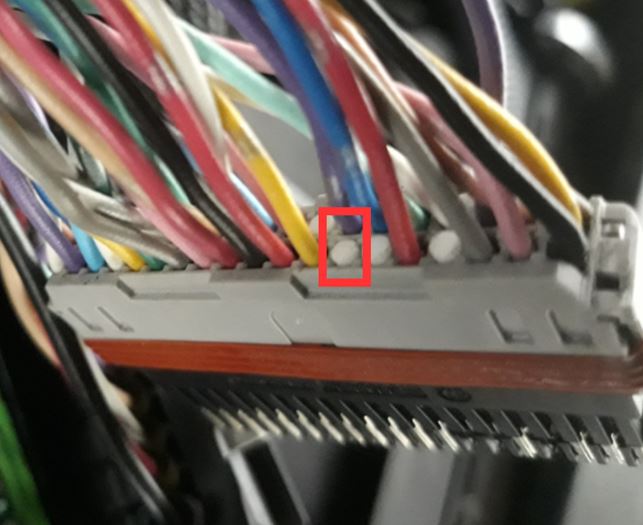
You'll want to add the 0-5v signal outputted from your sensor or gauge to pin 60 of connector F143 on the ECU.
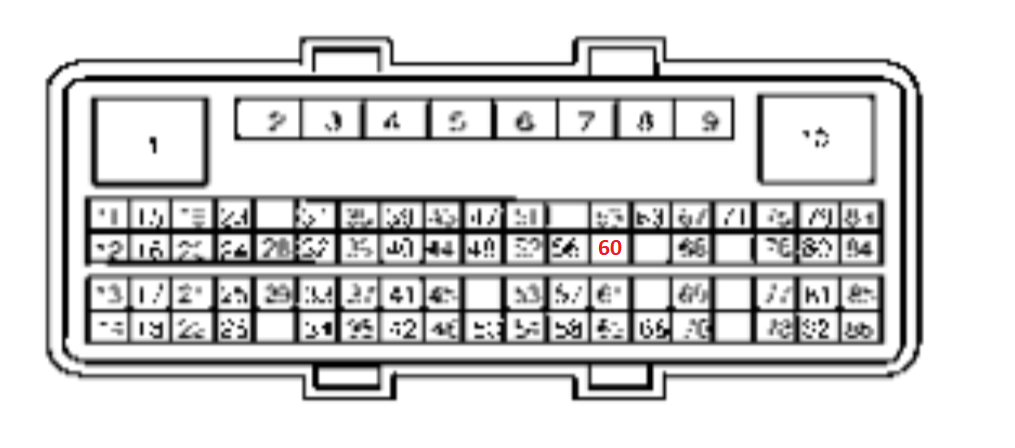
Pin 60 Install
You'll need to source a Delphi / Aptiv female terminal. These are typically accessible from reputable component suppliers.
P/N
Delphi GTS Female Crimp Termpinal Contact 20AWG PPI0000489
Aptiv (formerly Delphi) PPI00004890L

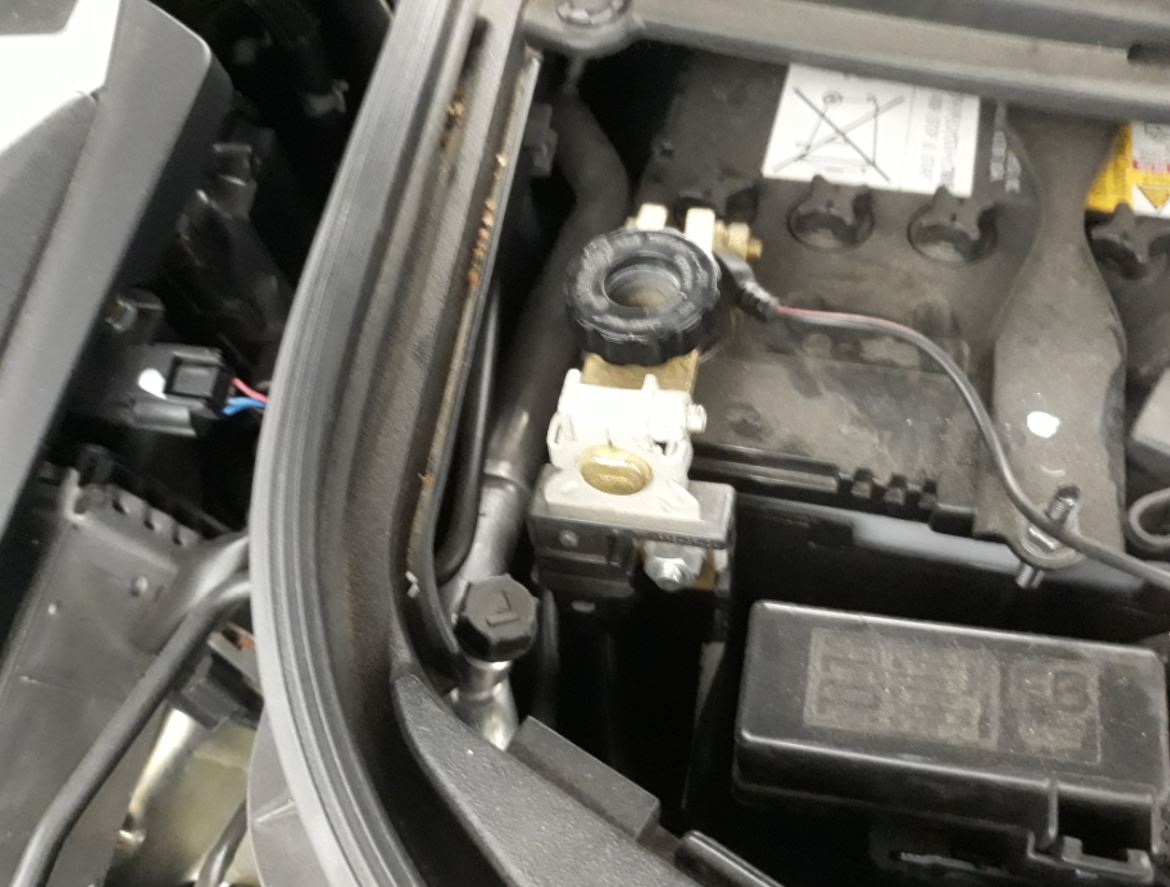
- Park your car in a flat level area and turn it off.
- Disconnect the battery Negative Terminal
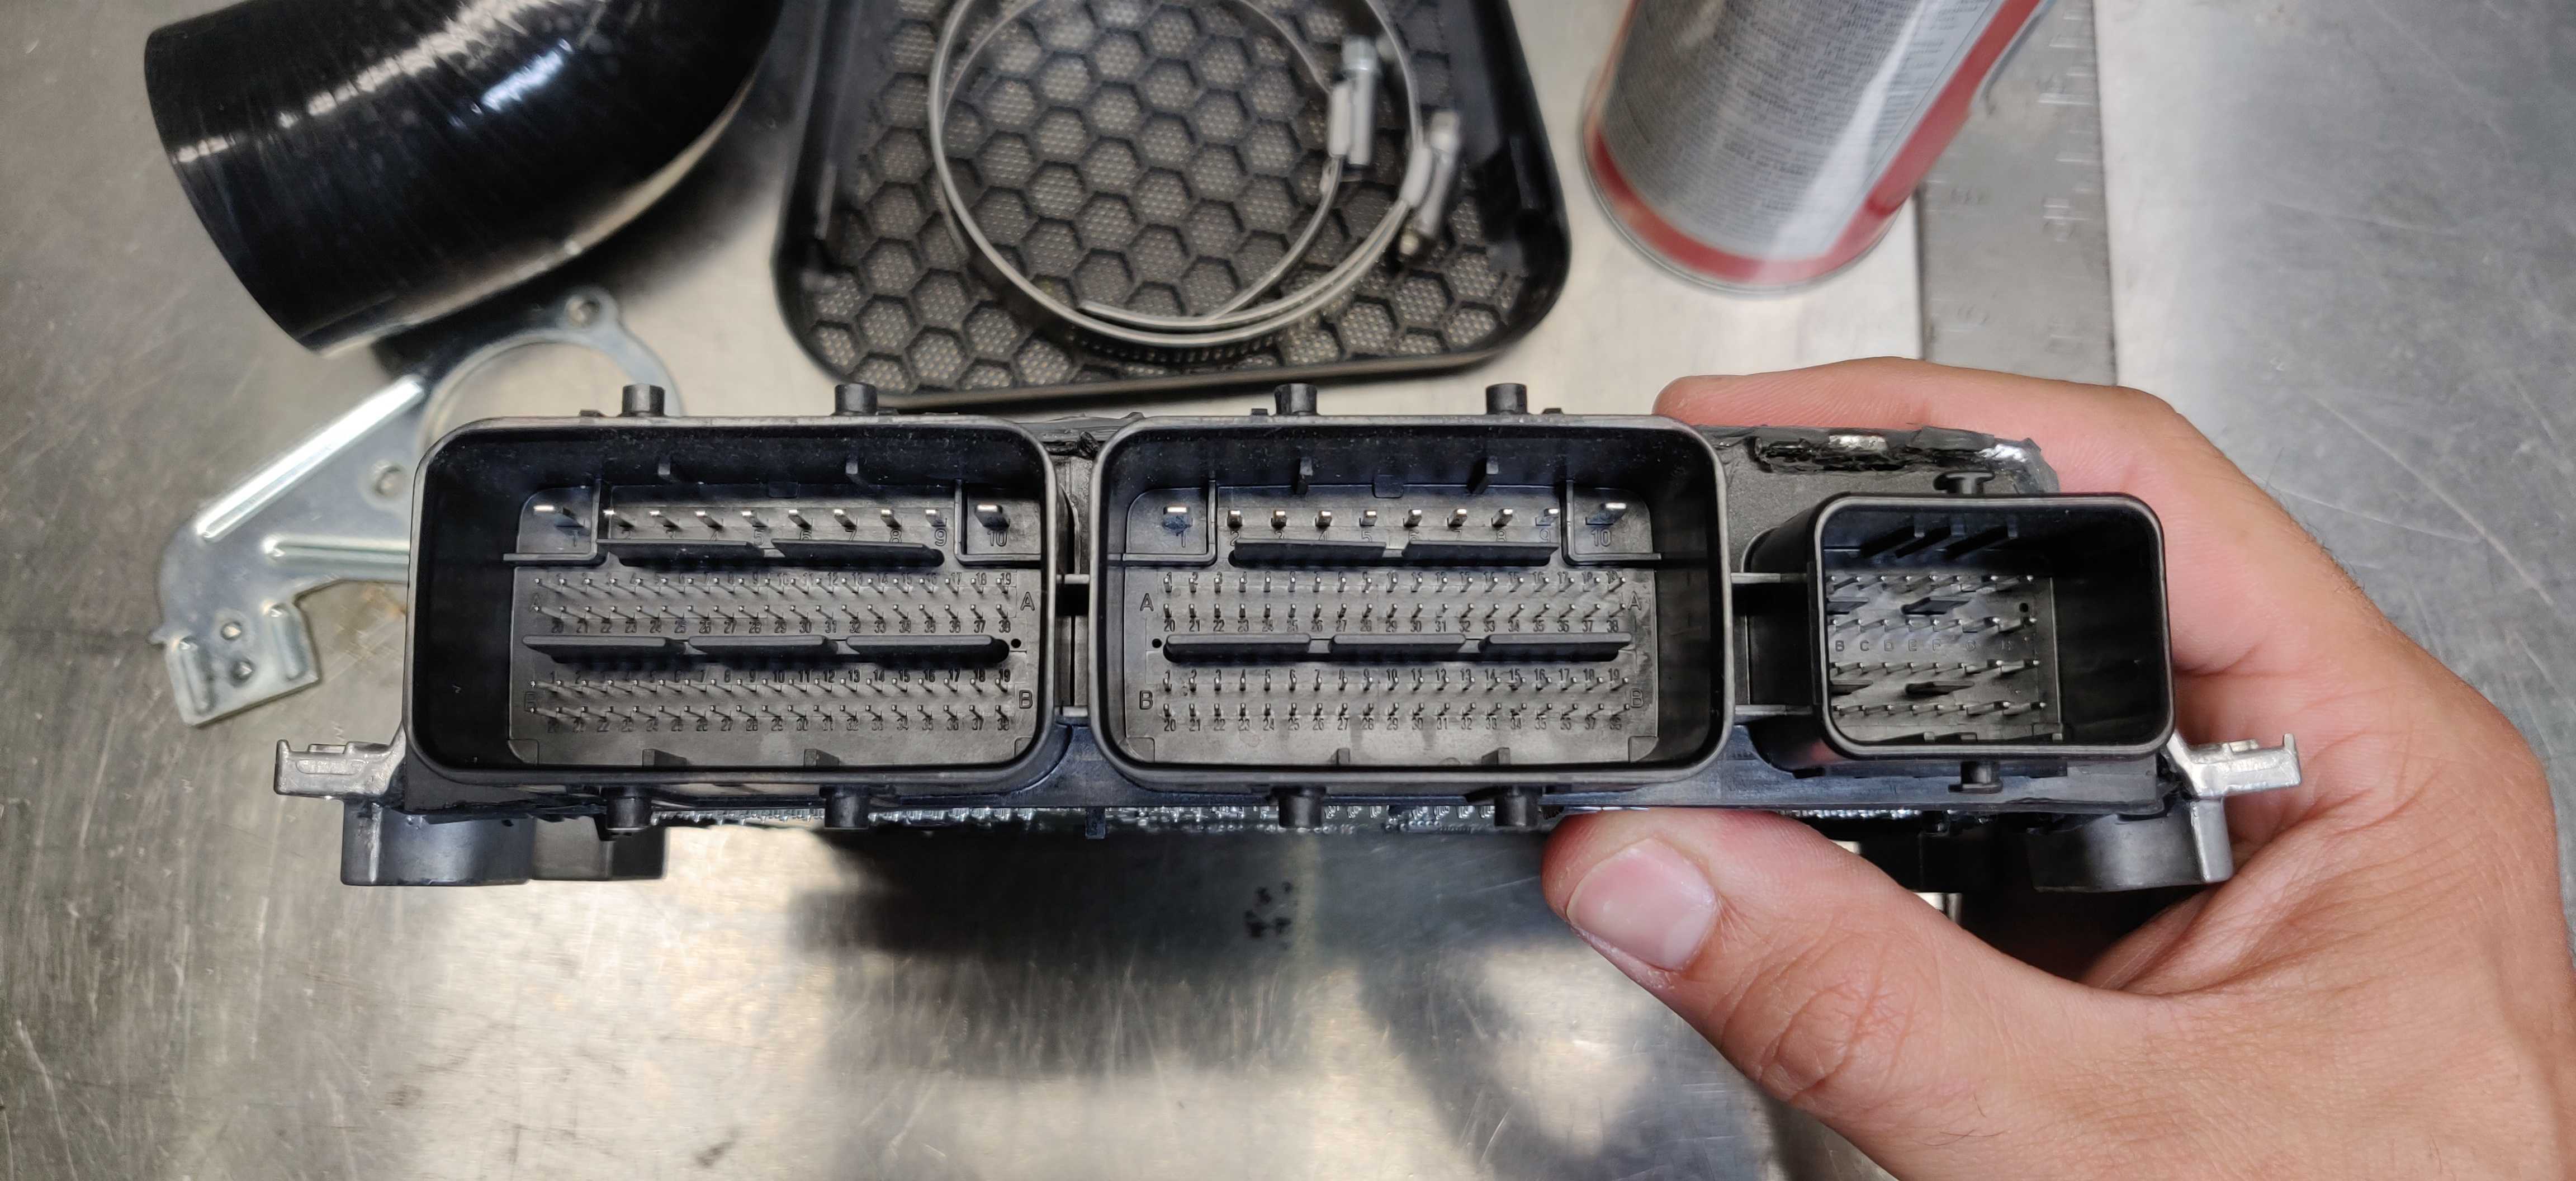
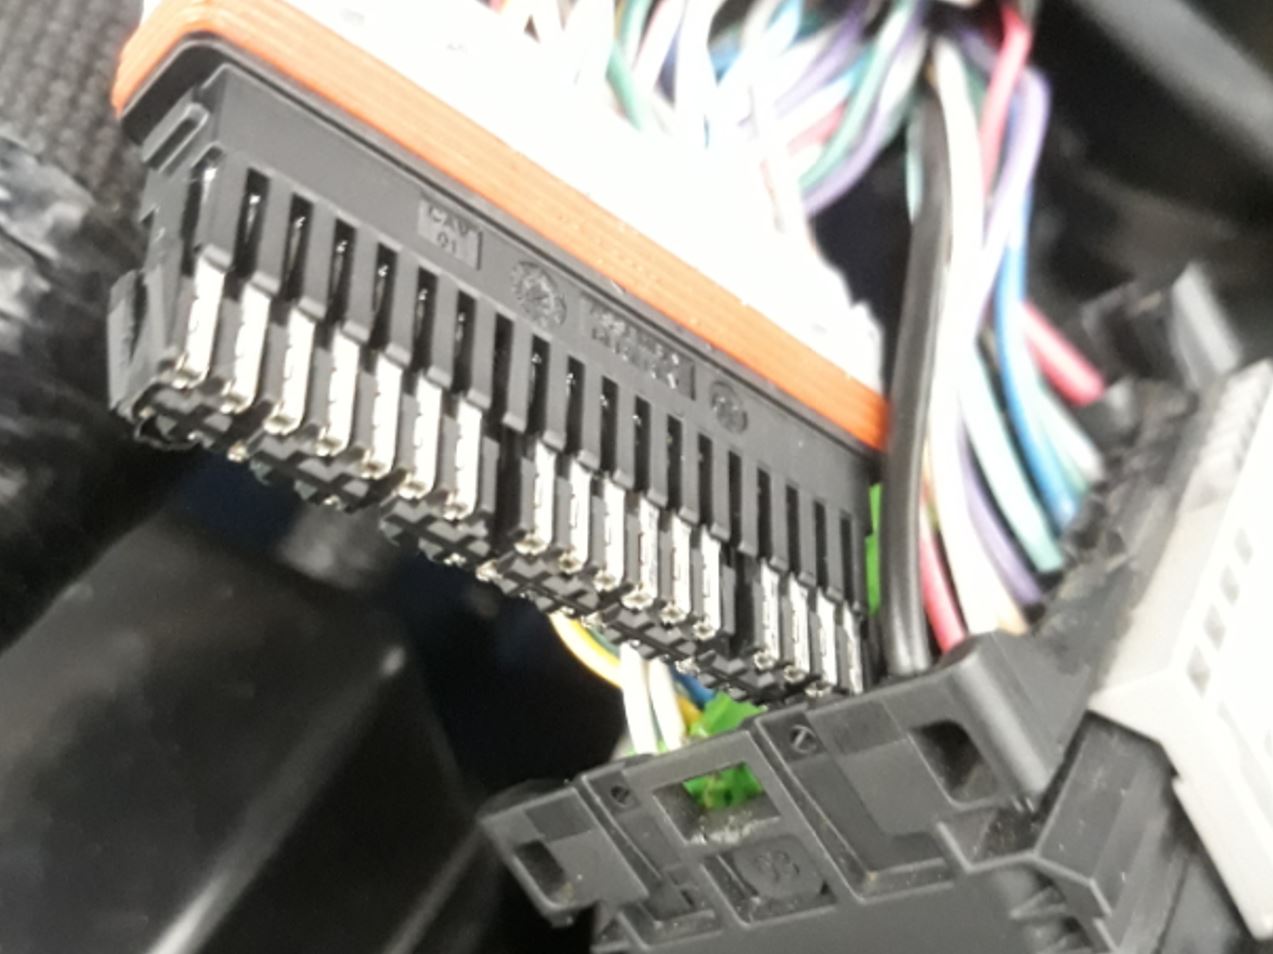
- Unclip the ECU connectors by pressing down on the release and sliding the grey catches over.
- Take the back housings off.
- Remove the brown connector cover.
- Unclip the second row terminal holder carefully at both ends.

- Slide the terminal carrier out of the header.
- Find Pin 60 and remove the blanking plug.
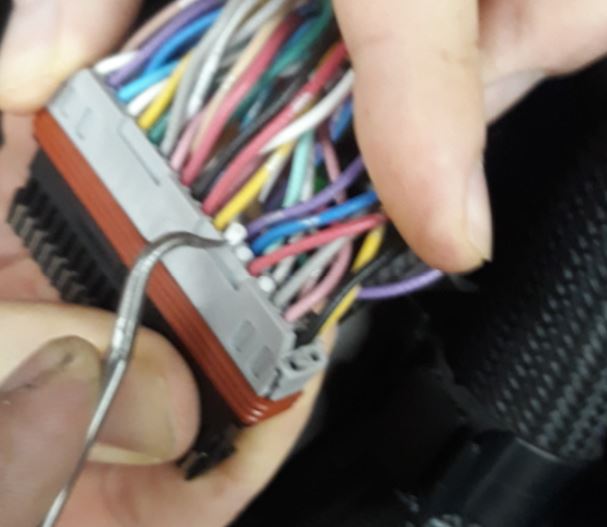
- Attach the terminal to the new wire and insert and lock the new terminal into place.
- Reassemble the connectors in reverse order.